Some car scratches you can fix at home. Many you can’t, and trying too hard makes them worse. Professional scratch-removal systems are built to take out minor scratches, scuffs, and small clear-coat defects with sanding, compounding, and polishing. That’s the honest line: light marks, yes; deep ones, no.
If a scratch is deep, through the clear coat, or showing colour or primer, no bottle fixes it safely. But for light marks, scuffs, and clear-coat scratches, a careful DIY process works surprisingly well.
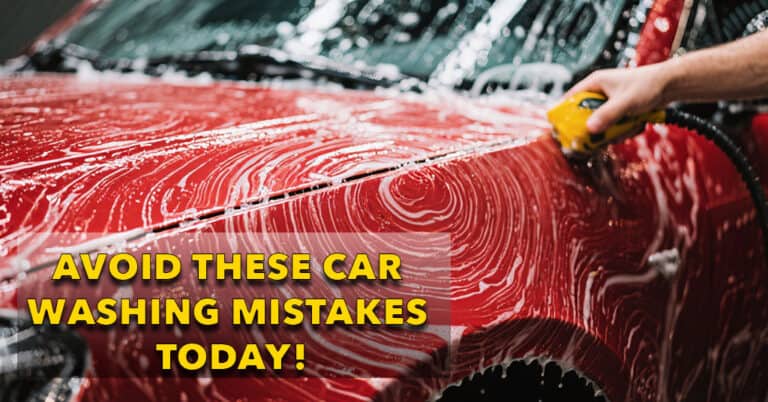
This guide is for Indian owners dealing with the real stuff: parking scratches, bike-handle marks, hard-water haze around a scuff, and the minor door scrapes you just want gone without making them worse.
TL;DR: You can remove many light car scratches at home if they are only in the clear coat. Professional scratch systems are marketed for minor scratches and scuffs on automotive clear coats, while PPG says OEM paint is only about 90–120 microns thick, so deep scratches should be handled carefully or professionally (PPG).
Before you begin
Your paint isn’t thick. PPG puts total OEM film build at about 90 to 120 microns (PPG Refinish, accessed 2026), so there’s little room for experimentation. Work conservatively.
What you’ll need:
- pH-safe car shampoo
- Microfiber towels
- A scratch remover or compound rated for clear coat
- An applicator pad, or a dual-action polisher
- A clay bar, if the surface is contaminated
- Touch-up paint, only if the scratch turns out deeper
- Strong light or sunlight for inspection
Time: 30 minutes to 2 hours. Difficulty: beginner to intermediate. Best done in shade, on a cool panel, in a clean spot.
Step 1: Identify the type of scratch
Classify before you rub anything. Most DIY damage starts when people skip this and attack every mark the same way.
The quick home test: wash the area, dry it, and run a clean fingernail lightly across the scratch.
- Doesn’t catch much: likely a light clear-coat scratch or scuff.
- Catches slightly: may still improve with correction.
- Catches hard, or shows colour loss: probably too deep for simple DIY.
- Shows white transfer: likely a scuff, not a true scratch.
The four types, roughly in order of how DIY-friendly they are: a clear-coat scratch is your best candidate; a base-coat scratch may need touch-up or repaint; primer-level damage isn’t a polishing job at all; and paint transfer or a scuff often wipes out with surprisingly mild methods. If the damage looks shallow and still glossy at the edges, carry on. If you can see primer or metal, stop.
Step 2: Wash and clean the area
Never correct a scratch on a dirty panel. Dust and grit drag under your pad and add fresh scratches.
Wash the panel with car shampoo, dry it with a clean microfiber, clay it lightly if it still feels rough, then look again in direct light. Sometimes the “scratch” you panicked about is only paint transfer, tar, or surface grime. Lovely when that happens. Either way, you now see the mark in its true form, not hidden or exaggerated by dirt.
Step 3: Start with the least aggressive method
Always begin with the mildest fix that has a chance. Meguiar’s says its Ultimate Compound is safe on clear coat and works by hand or DA polisher (Meguiar’s, accessed 2026), which makes it a sensible first move.
- Put a small amount of scratch remover or mild compound on an applicator.
- Work only the affected spot.
- Moderate pressure, short overlapping motions.
- Wipe clean.
- Inspect before repeating.
If the scratch fades noticeably after one or two passes, you’re in clear-coat territory. If nothing changes, stop. Don’t keep grinding. You’re looking for reduced visibility and a smoother reflection, with no fresh haze.

Step 4: Use machine correction only if needed
Some defects need more than hand pressure. A dual-action polisher makes sense when the scratch is light but stubborn, you’ve got the right pad and product, you can keep the pad flat, and you can stay off sharp edges.
The basic process: prime the pad lightly, spread the product before you bring the speed up, work a very small area, use slow overlapping passes, then wipe and inspect. A dual-action machine is safer for beginners than a rotary. If that one line saves you from buying the wrong machine, I’ve done my job. The area should improve without heavy haze, pad trails, or heat build-up.
Step 5: Know when a scratch needs touch-up, not polishing
With only about 90 to 120 microns of paint to work with, deep defects can’t be polished away forever. Switch from removal to repair when primer or metal shows, the scratch catches your nail hard, the damage runs to a panel edge, it’s wide and deep, or the paint is chipping. For those, the goal changes from erasing the scratch to making it less visible and protecting the exposed paint.
A mindset shift helps here: deep scratches get improved, not erased. Chasing total removal usually does more harm than the scratch itself.
Step 6: Refine and protect the area
Correction isn’t the end of the job. Wipe off all residue, follow with a finer polish if needed, then seal the area with wax, sealant, or a coating topper. Skip rough washing for the next few days. Freshly corrected paint picks up new defects fast if you go straight back to a careless wash.

Common mistakes
The product labels say “minor” for a reason, and most DIY trouble starts when people ignore that word.
- Treating every scratch as removable. Some need touch-up or repaint, not more rubbing.
- Working on a dirty panel, so grit adds new scratches.
- Too much pressure too early. Start mild, escalate only if the defect responds.
- Polishing edges hard. Edges and raised contours are the risk zones.
- Expecting one product to do everything. Compound, polish, touch-up, and protection each have a job.
The saddest version: a light scratch that could have cleaned up nicely, made worse because someone kept rubbing long after the paint stopped responding.
Results: What Success Looks Like
A successful home scratch repair does not always mean the mark vanishes. It means the defect is reduced safely, reflections look cleaner, and the area no longer jumps out at you every time you see the car.
For Indian daily drivers, that’s a great result. Perfection is lovely. Sensible improvement is smarter.
Frequently asked questions
Can toothpaste remove car scratches at home?
It can sometimes improve a very light scuff, since it has mild abrasives, but it isn’t a real detailing product. On modern thin clear coats, a purpose-made scratch remover or clear-coat-safe compound is the smarter, more predictable choice.
How do I know if a scratch is too deep to remove?
If your fingernail catches hard, or you can see base colour, primer, or metal, it’s usually too deep to polish out safely. At that point, touch-up or professional repair is the better route.
Can I remove car scratches by hand without a machine?
Yes, many light clear-coat scratches and scuffs improve by hand. Meguiar’s notes its clear-coat-safe compound works by hand or DA machine, which makes small-area DIY correction realistic.
What are the main types of car scratches?
Clear-coat scratches, base-coat scratches, primer-level damage, and paint transfer or scuffs. Clear-coat scratches are the most DIY-friendly; the deeper categories usually need touch-up or repaint rather than compounding.
Should I apply wax or ceramic protection after scratch removal?
Yes. Once you’ve corrected the area, protect it. Wax or sealant is fine for a simple DIY job; ceramic protection makes more sense if you want longer-lasting upkeep and the rest of the paint is in good shape.