Table of Contents
- Introduction
- Understanding Your Car’s Paint Structure
- Mistake #1: Using Wrong Cleaning Materials
- Mistake #2: Washing in Direct Sunlight
- Mistake #3: Relying on Automatic Car Washes
- Mistake #4: Wrong Washing Order
- Mistake #5: Single Bucket Method
- Mistake #6: Cross-Contamination with Tools
- Mistake #7: Improper Drying Techniques
- Mistake #8: Using Circular Motions
- Mistake #9: Ignoring Bird Droppings and Contaminants
- Mistake #10: Not Protecting After Washing
- The Right Way to Wash Your Car
- Protecting Your Investment with Ceramic Coating
- Conclusion
Introduction
Your car’s paint is more than just aesthetics—it’s a protective barrier that shields the metal underneath from rust, corrosion, and environmental damage. Yet, every time you wash your vehicle, you might unknowingly be causing irreversible damage that reduces your car’s value and visual appeal.
According to automotive detailing experts, improper washing techniques are responsible for up to 90% of paint damage seen on vehicles today. The seemingly innocent act of cleaning your car can result in unsightly scratches, swirl marks, and permanent etching that costs thousands of rupees to repair.
In this comprehensive guide, we’ll uncover the ten most common car washing mistakes that damage your paint and provide you with professional-grade solutions to keep your vehicle looking showroom-fresh for years to come.
Understanding Your Car’s Paint Structure
Before diving into the mistakes, it’s crucial to understand what you’re working with. Your car’s paint consists of several layers: the clear coat acts as a protective barrier against environmental damage, beneath which lies the base coat that provides the car’s color, followed by the primer layer that ensures proper adhesion.
The clear coat is only about 2-4 microns thick—thinner than human hair. This delicate layer is what gets damaged during improper washing, leading to visible scratches, swirl marks, and dullness.
Mistake #1: Using Wrong Cleaning Materials
The Problem
The biggest mistake car owners make is using dirty, abrasive, or inappropriate cleaning materials during car washing. Dirt particles trapped in sponges, towels, or mitts act like tiny sandpaper grains, scratching your car’s paint surface every time you wipe.
Common culprits include dirty or contaminated wash mitts, dish soap or household detergents, old t-shirts or paper towels, and rough sponges with large pores. Using household detergents like dish soap strips away essential protective waxes and sealants, leaving your paint vulnerable to damage from UV rays and environmental contaminants.
Why It’s Harmful
When dirt particles get trapped in your cleaning materials, they act like microscopic sandpaper. Every wipe across your paint creates tiny scratches that accumulate over time. Household detergents contain harsh chemicals designed to cut through grease, but these chemicals strip away protective waxes and sealants.
The Professional Solution
Invest in Quality Materials: Use premium microfiber wash mitts and choose pH-balanced car shampoos specifically formulated for automotive paint. Microfiber towels are filled with hundreds of thousands of little fibers which trap the dirt, pulling it away from the surface.
Implement the Two-Bucket Method: Fill one bucket with clean, soapy water and another with plain rinse water. After cleaning a panel, rinse the wash mitt in the clean water bucket to remove dirt particles, then reload it with fresh shampoo from the wash bucket.
Proper Microfiber Care: Wash microfiber towels separately from other laundry using cold water and avoid fabric softeners. Replace wash mitts when they become excessively dirty or contaminated.
Mistake #2: Washing in Direct Sunlight
The Problem
Washing your vehicle under direct sunlight might seem convenient, but it significantly harms your paint finish. Many car owners wash their vehicles during the middle of the day when the sun is brightest, thinking it will help dry the car faster.
Why It’s Harmful
Sunlight causes water and cleaning solutions to dry quickly, leaving water spots and chemical residues behind. These residues are not just visually unappealing; they also etch into your paint, creating hard-to-remove spots and causing the surface to look dull. Direct sunlight causes water and soap to dry too quickly, leaving behind water spots that contain minerals which etch into the clear coat over time.
Heat Expansion: Hot surfaces cause the paint to expand slightly, making it more susceptible to damage from contaminants and chemicals.
Chemical Reactions: Heat accelerates chemical reactions, making cleaning products more aggressive and potentially harmful to your paint’s protective layers.
The Professional Solution
Timing Is Everything: Wash your car in the early morning (6-9 AM) or late evening (5-7 PM). Choose overcast days when possible and ensure surfaces are cool to the touch before beginning.
Create Shade: Park in a shaded area or garage, use pop-up canopies for outdoor washing, and work on one section at a time to minimize exposure. If shade isn’t available, wash and rinse one section at a time to avoid soap drying on the paint.
Mistake #3: Relying on Automatic Car Washes
The Problem
Drive-thru car washes might seem quick and convenient, but they can be harsh on your vehicle’s paint. The brushes used in these automatic washes often collect dirt and debris from previous vehicles, turning them into abrasive tools that cause scratches and swirl marks on your car’s surface.
Why It’s Harmful
Contaminated Brushes: The same brushes clean hundreds of vehicles daily, collecting dirt, grit, and debris from each car. This accumulated contamination acts like sandpaper on your paint.
Aggressive Chemicals: Many automatic washes use harsh chemicals to speed up the cleaning process, which can strip protective coatings and damage paint.
The brushes used in automatic car washes use stiff bristles that can leave behind fine scratches. Paint damage is a real possibility during automatic car washes, and even modern automatic car washes can cause swirl marks that stand out more on dark-colored cars.
The Professional Solution
Hand Washing Superiority: Hand washing allows for careful inspection and targeted cleaning. You can control pressure and technique for different areas while taking a gentle approach that preserves paint integrity.
Professional Detailing: Invest in professional detailing services that use proper techniques. Look for facilities that offer touchless or hand-wash services and verify they use quality products and clean equipment.
Mistake #4: Wrong Washing Order
The Problem
Many car owners start washing from the bottom or middle of the car and work their way around randomly. This approach spreads dirt, mud, and grime from the dirtiest parts like doors and lower panels to cleaner areas like the roof, causing unnecessary scratching and contamination.
Why It’s Harmful
When you wash the dirtiest parts first, you contaminate your wash mitt with heavy dirt and debris. Using this contaminated mitt on cleaner surfaces transfers abrasive particles that create scratches and swirl marks. The lower portions of your vehicle accumulate the most road grime, brake dust, and environmental contaminants.
The Professional Solution
Top-Down Approach: Always start with the roof and work your way down systematically. Wash the roof first, followed by the upper body panels, then the middle sections, and finally the lower panels and wheels.
Section-by-Section Method: Complete one section entirely before moving to the next. Rinse each section immediately after washing to prevent soap from drying on the surface.
Separate Tools for Different Areas: Use dedicated wash mitts for different sections—one for the upper body, one for lower panels, and separate tools for wheels and wheel wells.
Mistake #5: Single Bucket Method
The Problem
Using only one bucket for the entire washing process is one of the most common mistakes car owners make. This method continuously recontaminates your wash mitt with dirt and grit that gets picked up from the vehicle’s surface, essentially turning your cleaning tool into sandpaper.
Why It’s Harmful
When you dip a dirty wash mitt back into the same soapy water, all the dirt, brake dust, and abrasive particles get mixed into your cleaning solution. Each subsequent use of the mitt spreads this contamination across your paint, creating fine scratches and swirl marks that accumulate over time.
The Professional Solution
Two-Bucket Method: Use one bucket filled with clean, soapy water (wash bucket) and another with plain rinse water (rinse bucket). After cleaning each panel, rinse the mitt thoroughly in the rinse bucket to remove dirt particles, then reload with fresh soap from the wash bucket.
Grit Guards: Install grit guards at the bottom of both buckets. These plastic inserts trap dirt and debris at the bottom, preventing it from getting back onto your wash mitt.
Multiple Wash Mitts: Use several wash mitts during the process, switching to a clean one when the current mitt becomes too contaminated.
Mistake #6: Cross-Contamination with Tools
The Problem
Using the same microfiber towels, wash mitts, or cleaning tools for wheels and paint is extremely damaging. This practice brings dirt, brake dust, and road grime from the dirtiest parts of the vehicle directly to the paint surface.
Why It’s Harmful
Wheels accumulate brake dust, which contains metal particles that are extremely abrasive. Road tar, salt, and other harsh contaminants also collect on wheels and wheel wells. When these substances come into contact with your car’s paint through contaminated tools, they cause immediate and permanent damage.
The Professional Solution
Dedicated Tool System: Maintain separate sets of tools for different areas:
- Paint Tools: Premium microfiber wash mitts and drying towels exclusively for painted surfaces
- Wheel Tools: Dedicated wheel brushes, mitts, and towels for wheels and wheel wells
- Interior Tools: Separate microfiber cloths for dashboard, seats, and interior surfaces
Color-Coding System: Use different colored tools for different purposes to avoid confusion. For example, blue for paint, red for wheels, and yellow for interior.
Proper Storage: Store tools separately and label them clearly to prevent accidental cross-contamination.
Mistake #7: Improper Drying Techniques
The Problem
Many car owners either let their vehicles air dry or use incorrect drying methods that damage the paint. Air drying leaves water sitting on the surface, while using rough towels or applying excessive pressure creates scratches.
Why It’s Harmful
Air Drying Issues: When water evaporates naturally, it leaves behind mineral deposits and contaminants that etch into the clear coat, forming difficult-to-remove water spots. These spots can permanently damage the paint if not addressed promptly.
Rough Drying: Using bath towels, old t-shirts, or applying too much pressure when drying can create fine scratches across the paint surface. Dragging towels across the paint instead of lifting water properly causes friction damage.
The Professional Solution
Pat-and-Pull Technique: Use clean, high-quality microfiber drying towels and employ a pat-and-pull method. Lay the towel flat on the surface and gently lift the water using the towel’s natural absorbency rather than dragging it across the paint.
Work in Shade: Always dry your vehicle in shade to prevent water spots from forming due to rapid evaporation.
Multiple Towels: Use several drying towels during the process, switching to dry ones as they become saturated to maintain maximum absorbency.
Chamois Alternative: Consider using a high-quality synthetic chamois or water blade for initial water removal, followed by microfiber towels for final drying.
Mistake #8: Using Circular Motions
The Problem
Many people instinctively wash and dry their cars using circular motions, thinking this provides better cleaning coverage. However, circular movements create distinctive swirl marks that are particularly visible on dark-colored vehicles under direct light.
Why It’s Harmful
Circular motions create a pattern of fine scratches that reflect light in all directions, causing the paint to appear dull and hazy. These swirl marks are especially noticeable on black, dark blue, and other dark-colored cars, significantly reducing the vehicle’s aesthetic appeal and resale value.
The Professional Solution
Linear Motions Only: Always use straight-line motions when washing and drying. Move the wash mitt or towel in straight lines following the contours and natural flow of the vehicle’s body panels.
Work with Panel Lines: Follow the natural lines of the car’s design. On the hood, work from front to back; on doors, work from top to bottom or front to back.
Overlapping Passes: Make overlapping straight passes to ensure complete coverage while maintaining the linear motion pattern.
Light Pressure: Use minimal pressure and let the cleaning products and tools do the work rather than applying force.
Mistake #9: Ignoring Bird Droppings and Contaminants
The Problem
Many car owners delay cleaning bird droppings, tree sap, or other environmental contaminants from their vehicle’s surface, not realizing the immediate damage these substances can cause.
Why It’s Harmful
Acidic Damage: Bird droppings contain uric acid with a pH ranging from 3 to 4.5, which can etch through the clear coat within hours, especially in warm weather. This etching creates permanent damage that requires professional paint correction to repair.
Heat Acceleration: Sunlight and heat accelerate the chemical reaction between acidic contaminants and your paint, making the damage occur even faster.
Staining: Tree sap, pollen, and other organic materials can permanently stain the paint if left untreated for extended periods.
The Professional Solution
Immediate Action: Clean bird droppings and other contaminants as soon as possible, ideally within a few hours of occurrence.
Proper Removal Technique:
- Soak the area with clean water to soften the contaminant
- Use a microfiber cloth with gentle pressure to lift the material
- Never scrape or use abrasive methods
- Follow up with proper washing and protection
Emergency Kit: Keep a spray bottle with distilled water and microfiber cloths in your car for immediate contaminant removal.
Mistake #10: Not Protecting After Washing
The Problem
After washing strips away protective wax layers and natural oils from the paint, many car owners forget to reapply protection, leaving the paint vulnerable to environmental damage.
Why It’s Harmful
UV Exposure: Without protective layers, UV rays directly attack the paint, causing oxidation, fading, and clear coat degradation over time.
Environmental Damage: Unprotected paint is more susceptible to acid rain, bird droppings, tree sap, and other environmental contaminants that can cause permanent etching and staining.
Accelerated Aging: Paint without protection ages much faster, losing its gloss, depth, and color intensity.
The Professional Solution
Regular Protection Schedule: Apply wax every 2-3 months or ceramic coating for longer-lasting protection.
Quality Products: Use high-grade automotive wax or sealants specifically designed for paint protection.
Proper Application: Follow manufacturer instructions for application and curing times to ensure maximum effectiveness.
Ceramic Coating: Consider professional-grade ceramic coating for superior, long-lasting protection that can last 3-5 years.
The Right Way to Wash Your Car
The Two-Bucket Method
This professional technique is the gold standard for safe car washing. The two bucket method uses two separate buckets when washing your car: one wash bucket filled with soapy water and one rinse bucket filled with clean water.
After cleaning a panel, you rinse the wash mitt in the bucket to rinse out the dirt particles, then reload it with fresh shampoo from the wash bucket. This way, you avoid contaminating your wash and drastically reduce the chance of scratching the paint.
Many detailers also add a grit guard/separator to the bottom of each bucket. This barrier helps trap grime and prevents it from getting back onto your wash media.
Proper Washing Sequence
Pre-Rinse: Start by thoroughly rinsing the entire vehicle to remove loose dirt and debris.
Wheels First: Clean wheels and wheel wells before washing the body to prevent splashing dirty water onto clean paint.
Top-Down Approach: Start with the roof and work downward, washing wheels and lower panels last since they’re the dirtiest. Rinse each section immediately after washing.
Linear Motions: Use straight-line motions, not circular patterns. Work with the contours of your vehicle and avoid applying excessive pressure.
Drying Techniques
Professional Drying: Use clean, high-quality microfiber drying towels and employ a pat-and-pull technique rather than dragging. Work in shade to prevent water spots. Instead of dragging the towel across the paint, lay it flat on the surface and gently lift the water using the towel’s weight and absorbency.
Protecting Your Investment with Ceramic Coating
The Ultimate Paint Protection
After perfecting your washing technique, the next step is applying long-term protection. Ceramic coating creates a durable, transparent layer on your vehicle’s surface that acts as a shield against various environmental contaminants, including UV rays, bird droppings, tree sap, and road salts.
Benefits of Ceramic Coating
Superior Protection: Ceramic coating creates a harder, more durable surface that is resistant to oxidation, chemicals, and UV light. It protects against UV rays, bird droppings, and tree sap while reducing the adhesion of dirt and contaminants.
Enhanced Appearance: Ceramic coating can give your car’s paint an extra level of shine and luster, making it look like new. The coating enhances your car’s gloss, depth, and color intensity, creating a showroom-quality appearance.
Easy Maintenance: Once your car has been ceramic coated, it will be easier to keep clean. Water and dirt will bead up on the surface and can be easily wiped away due to the hydrophobic properties.
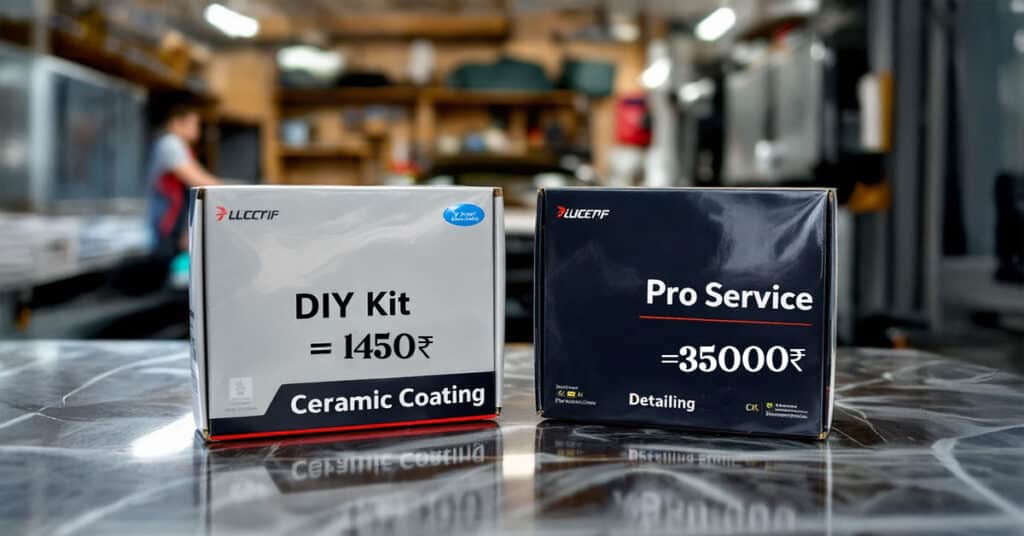
Super Ceramic Coating Advantage
Super Ceramic Coating has served over 35,000+ happy customers with top-quality car care products, and customers have saved a total of 6 crores by using their affordable DIY packages instead of expensive detailing services. The company uses only the finest raw materials and all products undergo rigorous testing.
Complete DIY Kits: Super Ceramic Coating offers everything you need for professional application, including premium microfiber towels, application pads, and detailed instructions. Their latest product is the Graphene coating, which harnesses the incredible strength of graphene—the strongest material known to man.
Cost-Effective Solution: Super Ceramic Coating’s DIY kits offer professional-grade protection at a fraction of professional installation costs with easy application process and long-lasting results. The company is committed to making car maintenance and protection accessible to everyone without sacrificing quality or affordability.
Application Process
Preparation: Thoroughly wash and decontaminate your vehicle using the proper techniques outlined above.
Surface Prep: Ensure paint is clean and free of residues.
Application: Apply ceramic coating following manufacturer instructions.
Curing: Allow proper curing time for maximum effectiveness.
Economic Impact of Proper Car Care
Cost of Paint Damage
Professional paint correction can cost ₹15,000 – ₹50,000, while a full repaint ranges from ₹1,00,000 – ₹3,00,000.
Resale value loss for damaged paint can be 20-40% of the vehicle’s value.
Prevention Savings
Quality washing supplies require a ₹5,000 – ₹10,000 one-time investment, while Super Ceramic Coating kits cost ₹8,000 – ₹15,000 for 3-5 years protection. Total savings versus professional services can reach up to ₹2,00,000 over the vehicle’s lifetime.
Investing in proper car care maintains vehicle value, reduces long-term maintenance costs, preserves aesthetic appeal, and provides satisfaction of ownership.
Environmental Considerations
Eco-Friendly Practices
Water Conservation: Use spray bottles for targeted cleaning and choose biodegradable car shampoos.
Chemical Responsibility: Dispose of wash water properly and use environmentally safe products.
Super Ceramic Coating is committed to environmental responsibility through eco-friendly formulations and reduced water usage due to self-cleaning properties. Long-lasting protection reduces the need for frequent washing.
Conclusion
Proper car washing involves avoiding ten critical mistakes that can permanently damage your vehicle’s paint. By understanding and implementing the correct techniques—using quality materials, proper washing order, the two-bucket method, dedicated tools, correct drying methods, linear motions, immediate contaminant removal, and post-wash protection—you can preserve your vehicle’s appearance and value for years to come.
The key takeaways for maintaining pristine paintwork include investing in quality materials like premium microfiber towels and pH-balanced shampoos, timing your washes during cooler parts of the day, implementing proper techniques like the two-bucket method, and applying ceramic coating for long-term paint preservation.
Take Action Today
Don’t wait until damage occurs. Start implementing these techniques immediately and consider investing in Super Ceramic Coating’s professional-grade DIY kits to give your vehicle the protection it deserves. Your car’s paint is an investment worth protecting, and with the right knowledge, tools, and products, you can maintain that showroom shine while preserving your vehicle’s value for years to come.
Ready to transform your car care routine? Visit Super Ceramic Coating today and discover why over 35,000 vehicle owners trust their products for superior paint protection.