Ceramic coating only works when the prep is right. That’s the big truth. Gtechniq says ceramic coating life can range from 2 to 10 years, but it depends heavily on product quality, application quality, and aftercare (Gtechniq, 2025). So if you want real durability, don’t start with the bottle. Start with the surface.
This guide breaks down the ceramic coating process in a way Indian car and bike owners can actually use. We’ll cover the tools, the preparation, how to apply the coating panel by panel, what mistakes to avoid, and when you should stop and let a professional handle it.
TL;DR: Ceramic coating is mostly a prep job. Gtechniq says coating lifespan can range from 2 to 10 years depending on application and aftercare (Gtechniq, 2025). Wash, decontaminate, correct, panel-wipe, coat small sections, and protect the car from water during curing if you want results that actually last.
Before You Begin
According to The Rag Company’s 2026 guide, successful coating application starts with wheel cleaning, wash, decontamination, paint correction, panel wipe, then the coating itself (The Rag Company, 2026). In other words, coating is near the end of the workflow, not the beginning.
What you’ll need:
– pH-neutral car shampoo
– Separate wash mitts and microfiber towels
– Iron remover and tar remover if needed
– Clay bar or synthetic clay media
– Machine polish and pad if the paint needs correction
– Panel wipe or surface prep spray
– Ceramic coating applicator block and suede/applicator cloth
– Good lighting
– Covered, dust-controlled space
– Time: 5 to 10 hours for a careful DIY job
– Difficulty: Intermediate to advanced
Autoglym recommends working in 50 cm x 50 cm sections, watching flash time closely, allowing at least 4 hours cure time, and not washing the car for 24 hours after application (Autoglym, 2026). That’s a useful benchmark for most DIY coatings too.
Step 1: Wash the vehicle properly
Proper washing is the first real part of the ceramic coating process because whatever stays on the surface can get trapped under the coating. Chemical Guys says over 95% of swirls and scratches come from improper wash techniques, bad towels, or single-bucket washing (Chemical Guys, 2025). So this step is not cosmetic. It is risk control.
By the end of this step, your vehicle should be free of loose dirt, road film, and wheel grime.
- Start with the wheels and tyres first.
- Pre-rinse the full vehicle from top to bottom.
- Use a two-bucket wash with a pH-balanced shampoo.
- Wash top to bottom using a clean mitt.
- Rinse thoroughly and dry with a clean microfiber towel or blower.
Chemical Guys also recommends shade, pH-balanced shampoo, straight-line motions, and top-to-bottom washing to cut down fresh marring (Chemical Guys, 2025).
Verification: Run a clean hand inside a nitrile glove lightly over the paint. It should feel cleaner, but not necessarily smooth yet.
Step 2: Decontaminate the paint
A coating bonds best to bare, clean paint, not to fallout, tar, or old protection. The Rag Company’s process includes iron removal, citrus pre-cleaning, and clay decontamination before coating (The Rag Company, 2026). That’s why skipping decon is one of the fastest ways to waste a good bottle.
By the end of this step, the paint should feel smooth and free from bonded contamination.
- Spray iron remover on paint and wheels where required.
- Use tar remover on stubborn lower-panel contamination.
- Clay the paint gently with lubricant.
- Re-wipe and dry the car.
If you live near the coast, park under trees, or wash with hard water, this step matters even more. Indian daily drivers pick up contamination quickly. A white car hides it. A black car screams it.
Verification: The paint should feel noticeably smoother after claying. If it still feels gritty, repeat only where needed.
According to Gtechniq, ceramic coatings protect against bird droppings, UV damage, and chemical contamination, but only once a proper bonded layer has formed on the paint (Gtechniq, 2025).
Step 3: Correct paint defects if needed
Ceramic coating locks in the finish you have. It does not magically remove swirls. Gtechniq explicitly says coatings are not completely scratch-proof and only help resist light wash-induced marks (Gtechniq, 2025). That means if the paint is already hazy, the haze will still be there after coating.
By the end of this step, your paint should look as good as you want it to look for the next year or more.
- Inspect the paint under direct lighting.
- Do a test spot with the mildest polish and pad combination.
- One-step polish if the paint only has light swirls.
- Increase aggression only when necessary.
- Wipe residue often and inspect as you go.
This is the stage where many DIY owners rush because they’re excited to apply the coating. Big mistake. If the car looks only “okay” after polishing, it won’t look better once coated. It will just look “okay, but glossy.”
Verification: Check the same panel from different angles and under different light. You should see fewer swirls, better clarity, and more uniform gloss.
According to The Rag Company, their example coating workflow used a dual-action polisher and finishing polish before panel wipe (The Rag Company, 2026).
Step 4: Do a panel wipe and set up your application zone
Panel wipe removes polishing oils, leftover residue, and anything else that could interfere with bonding. Autoglym says the surface must be clean, dry, and free of contaminants, waxes, sealants, and oils before the coating stage (Autoglym, 2026). That is one instruction you should follow without compromise.
By the end of this step, the car should be coating-ready.
- Spray prep solution onto a towel or panel.
- Wipe systematically in straight lines.
- Flip towels often.
- Move the car indoors or into shade with low dust.
- Lay out your applicators and buffing towels before you start.
Verification: The paint should look clean, crisp, and free from smeary oils.
According to The Rag Company, panel wipe is essential so the coating can bond properly after polishing (The Rag Company, 2026).
Step 5: Apply the ceramic coating panel by panel
This is the part people focus on, but it is actually the shortest stage when prep was done properly. Autoglym recommends applying in 50 cm x 50 cm sections, using straight lines, watching for flash, and buffing when the film forms, which may take 1–2 minutes on warmer days or 3–5 minutes on cooler days (Autoglym, 2026).
By the end of this step, the paint should have an even, high-clarity coated finish with no high spots.
- Prime the applicator with the coating.
- Apply to a small section in a crosshatch or straight-line pattern.
- Watch for flash or rainbowing based on the product’s instructions.
- Level and buff with clean microfiber towels.
- Inspect immediately for streaks or missed areas.
- Repeat panel by panel.
The Rag Company’s guide describes using a microfiber applicator and “river method” for even distribution, followed by buffing once the product flashes (The Rag Company, 2026).
Verification: Shine a light across the panel. You should not see dark smears, patches, or high spots.
Step 6: Let it cure and protect the finish
The job isn’t done when the last panel is wiped. Cure time is part of the ceramic coating process. Autoglym says to allow a minimum of 4 hours curing time and avoid washing the vehicle for 24 hours after application (Autoglym, 2026). Gtechniq also says contamination during curing can reduce performance and lifespan (Gtechniq, 2025).
By the end of this step, the coating should have the best possible chance to harden properly.
- Keep the vehicle dry.
- Avoid dust, bird droppings, and tree sap during early cure.
- Don’t touch-test the panels repeatedly.
- Delay your first wash based on product instructions.
- Use only gentle maintenance afterward.
For Indian owners, planning the job around weather matters almost as much as planning the steps. Coating a car during an unpredictable pre-monsoon week or in a dusty apartment basement is asking for trouble. Better to wait one extra weekend than redo the work.
Verification: Water exposure should be avoided during the first cure window. If contamination lands on the car, remove it carefully per the coating maker’s aftercare instructions.
Common Mistakes to Avoid
Gtechniq says poor application, inadequate curing time, UV exposure, harsh chemicals, and inadequate maintenance all reduce coating life (Gtechniq, 2025). Here are the errors that matter most.
1. Coating without correcting the paint
The coating will preserve whatever finish is underneath. Fix swirls first if appearance matters.
2. Working in direct sun or on hot panels
Flash times become harder to control. That increases the risk of streaking and high spots.
3. Using too much product
More coating does not mean more protection. It usually means more buffing trouble.
4. Using poor towels
Dirty or low-quality microfiber can add marring right after correction.
5. Ignoring curing
Autoglym’s minimum 4-hour cure guidance is a reminder that rushing the post-application period can ruin the finish (Autoglym, 2026).
What success looks like
If everything went correctly, your vehicle should now have a cleaner, glossier, more water-repellent finish that is easier to maintain. According to 3M India, ceramic coating helps create a slick surface for easy maintenance and durable water beading for up to five years with proper care (3M India, 2026).
The finish should look crisp in sunlight, feel smoother to the touch, and rinse easier during later washes. Your stretch goal after this? Build a smart maintenance routine so the coating doesn’t die early from bad washing.
Frequently Asked Questions
Can I apply ceramic coating at home?
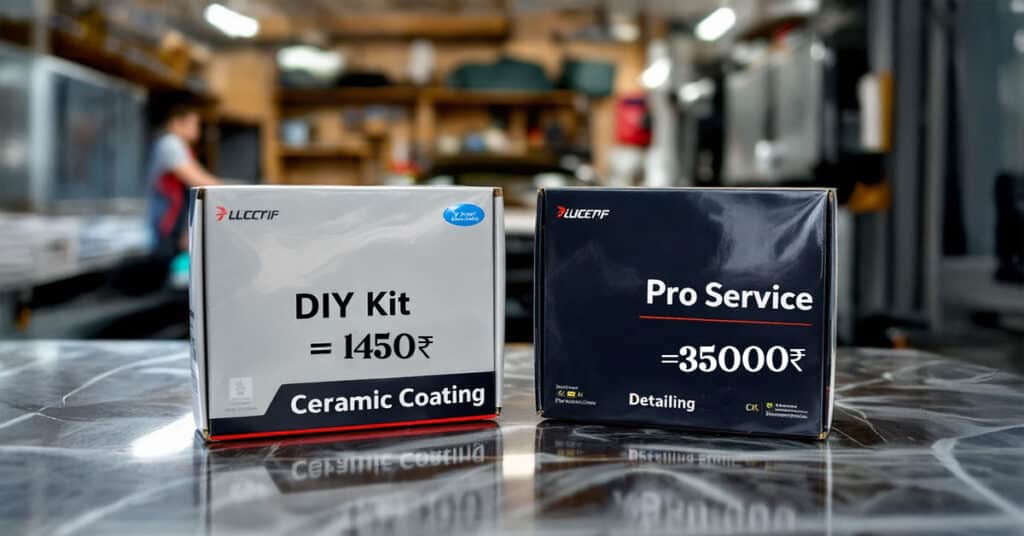
Yes, many consumer-grade products are designed for DIY users. Gtechniq says DIY coatings usually sit in the 1–3 year range, while some professional systems carry longer guarantees (Gtechniq, 2025). If your paint needs heavy correction, professional help is smarter.
Do I really need paint correction before coating?
If the paint has swirls or haze, yes. Ceramic coating does not remove defects. Gtechniq notes coatings are not scratch-proof and only add some resistance to light marks (Gtechniq, 2025).
How long does ceramic coating take to apply?
A proper DIY job often takes most of a day because prep is the longest stage. The Rag Company’s process includes wash, decontamination, correction, panel wipe, and coating before aftercare even begins (The Rag Company, 2026).
How soon can I wash the car after coating?
Autoglym says not to wash the vehicle for 24 hours after application and to protect it from wet weather during early cure (Autoglym, 2026). Always follow the product-specific instructions you bought.
Is ceramic coating worth it after all this work?
Usually yes, if you want easier maintenance and longer-lasting protection. 3M India says its ceramic coating can remain durable for up to five years with proper care (3M India, 2026). The real question is whether you’ll maintain it properly afterward.
Conclusion
Applying ceramic coating is not difficult because it is mysterious. It is difficult because it rewards patience. Wash carefully, decontaminate thoroughly, correct what needs correcting, wipe the surface down properly, and coat in small sections.
Do that, and the result can look stunning. Rush it, and the bottle won’t save you.